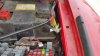
Here's the pics:
Labeled the wires:
Some split loom for protection:
Pin 1 marked, pin 5 is below pin 1, numbered right to left when look at the plug head on:
Removed the top of the fuse block, takes some effort but it does come up after you unclip the tabs on the ends:
Here you can see the spot it plugs in (circled in yellow):
Make sure these two plugs are pulled all the way up until they click before you close it back up (do this now before you forget):
The tabs that are right up against the plugs and are circled in yellow are what need to click into place, just pull up on the connector until each end is secured (I used a screwdriver to help get leverage on the end the wires go out from, they like to be stubborn, the other ends are usually already in place or easy to lift up enough):
Routing the wires out was a bit of a challenge, it took me several tries before I figured out how to route them so that it didn't get pinched or keep the top from snapping down in place. I have them going out with the main harness but to the side and underneath it:
Then they are just right there for you to add on to later. I put some heat shrink on the ends of the ones I wasn't using just yet (along with some liquid tape inside the end to seal it up), mostly to protect the wires but also the ones hooked to the SPO circuit will be live when the key is on since I added the fuse for that to use with my backup camera monitor, so not shorting out would be great. The others don't have any fuses in their places, except for pin 1 which is part of the parking lamp circuit and is live when they are on. Be safe and smart!
Here you can see the spot for pin 8 is empty (bottom left of connector), since I determined the schematic is right and it really isn't hooked up to anything, so I removed that wire and left it empty.
And it's all back in place! Tada!!
Now when I want to add other things I'll have a nice factory type setup for them. Super clean and pretty inexpensive, considering the harness pigtail was maybe $30.