
D
Dennis
Guest
Due to some requests for me to document the Brake Job I performed on my 06 H3..I by no means am suggesting this is the best way or the only way, in fact it is only my version of what I did and in no way am I a pro...You are more than welcome to uses this information, but at your own risk …here it is…
To begin with, I’ll consider everybody knows enough about why to Use jack stands and how to take off a tire, etc...You need a 19MM socket for the lug nuts and when re-installing, use 100 lbft of torque. (do not lubricate lugs)..Clean, dry and dirt free is what they should be.
Word of advice: if you are installing brand new rotors..first take them to a tire and wheel place and have them checked for run out..I bought 4 new ones and one of them needed to be turned to true it up…
SUPPLIES:
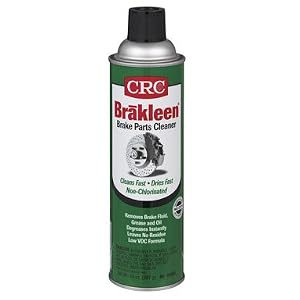
4 cans of spray Brake Cleaner
Anti-Seize compound

Brake Lubricant

¼” rubber or plastic tubing and a container for waste oils
00 steel-wool or Scotch bright
A ton of old rags or towels
TOOLS:
3/8” and ½” ratchet(s) and ½”Breaker bar.
19MM, 18MM (1/2” drive)
15MM, 17MM 11MM, 10MM, (combination box wrenches)
6” adjustable wrench
C-Clamp that will open about 6”
Small flat tip screwdrivers
Needle nose pliers
Small art paint brush
Once the tire is removed the first thing is to wash down the caliper assy with Brake Cleaner to flush out all the loose crap and dirt, don’t use it all..have a drip pan (waste oil container) under the hub to catch the run off.
Next: remove the little spring clips in the ends of the Pad guide pins and then pull out the pins…Clean these pins real good with scotch bright or steel wool to make them shiny and smooth...Lubricate the whole pin with Brake Lubricant and set aside for now.


Next: Remove the little spring thingy that fits into the bottom of the caliper holding the pads apart

Next: remove the Brake pads..you can use a small Phillips screwdriver to pry them up by the holes in the top and they will eventually work out to where you can pull them out by hand..Save one of the worn out pads for later.


Next: Remove Caliper assy from Hub by removing two 18MM bolts..they are on tight, so you may want to use the ½” breaker bar.

Next: Remove the caliper assy and compress the pistons using one of the old pads and a C-clamp...be sure to crack open the bleeder nipple first (10MM box) and drain it with ¼” tubing to the pan..If you don’t open the bleeder nipple, you might push the other set of pistons out of the caliper. Close bleeder nipple off before you remove C-clamp, this will prevent air from sucking back in. Do both sides of caliper.

Next: Clean caliper assy as best you can..especially clean the area where the Pad edges slids on..then lubricate, also lubricate heavy, the piston edges..more here will stop squealing later NOTE: Be careful not to strain Brake hose..support caliper on an upside down pale or something.


Next: work off these little pain in the ass keepers..don’t break them as you’ll need them later to hold the new rotor in place while you assemble everything.

Next: Remove rotor by screwing in two 17MM bolts in the pre drilled and tapped holes in the rotor ..Do not beat off with a hammer.

Next: Clean rust from hub face with scotch bright or steel wool and then smear a light film of anti-seize compound on the face of hub.

Next; Install new Rotor and secure with those little star keepers I told you not to break while removing.

Next: Reinstall Caliper assy and drop in new pads (pad with the squeaker goes to the inside) Reinstall that spring thingy, then Slide in guide pins and reinsert the little keeper clips in the ends of the pins.
Done
Next well do the rear Brakes
First..Disengage the Parking Brake Cable

Now remove the Caliper assy guide pin bolts (14MM)

Then remove the Caliper Cradle Two 15MM bolts and clean and lubricate all the slide areas and the guide pins that are inside the rubber cups.

Next: remove the rotor like you did on the front ones and you will see a Drum Brakes Assy..(Parking Brake)..Flush this area out real good with Brake cleaner and leave alone otherwise.

Next; Clean the caliper and compress the pistion the same way as you did in the front brake (crack open the bleeder nipple with a 11MM box wrench) and lubricate the piston edges and the appossing side that touches the outside pad..Squeaker pad goes on the inside up against the piston.
Use the anti-sieze in the same area as the front brakes.
Reassemble basically in reverse and don't forget to top off Brake reservoir with fresh Delco Supreme II DOT3 fluid after you pump up the Brakes.
To begin with, I’ll consider everybody knows enough about why to Use jack stands and how to take off a tire, etc...You need a 19MM socket for the lug nuts and when re-installing, use 100 lbft of torque. (do not lubricate lugs)..Clean, dry and dirt free is what they should be.
Word of advice: if you are installing brand new rotors..first take them to a tire and wheel place and have them checked for run out..I bought 4 new ones and one of them needed to be turned to true it up…
SUPPLIES:
4 cans of spray Brake Cleaner
Anti-Seize compound
Brake Lubricant
¼” rubber or plastic tubing and a container for waste oils
00 steel-wool or Scotch bright
A ton of old rags or towels
TOOLS:
3/8” and ½” ratchet(s) and ½”Breaker bar.
19MM, 18MM (1/2” drive)
15MM, 17MM 11MM, 10MM, (combination box wrenches)
6” adjustable wrench
C-Clamp that will open about 6”
Small flat tip screwdrivers
Needle nose pliers
Small art paint brush
Once the tire is removed the first thing is to wash down the caliper assy with Brake Cleaner to flush out all the loose crap and dirt, don’t use it all..have a drip pan (waste oil container) under the hub to catch the run off.
Next: remove the little spring clips in the ends of the Pad guide pins and then pull out the pins…Clean these pins real good with scotch bright or steel wool to make them shiny and smooth...Lubricate the whole pin with Brake Lubricant and set aside for now.
Next: Remove the little spring thingy that fits into the bottom of the caliper holding the pads apart
Next: remove the Brake pads..you can use a small Phillips screwdriver to pry them up by the holes in the top and they will eventually work out to where you can pull them out by hand..Save one of the worn out pads for later.
Next: Remove Caliper assy from Hub by removing two 18MM bolts..they are on tight, so you may want to use the ½” breaker bar.
Next: Remove the caliper assy and compress the pistons using one of the old pads and a C-clamp...be sure to crack open the bleeder nipple first (10MM box) and drain it with ¼” tubing to the pan..If you don’t open the bleeder nipple, you might push the other set of pistons out of the caliper. Close bleeder nipple off before you remove C-clamp, this will prevent air from sucking back in. Do both sides of caliper.
Next: Clean caliper assy as best you can..especially clean the area where the Pad edges slids on..then lubricate, also lubricate heavy, the piston edges..more here will stop squealing later NOTE: Be careful not to strain Brake hose..support caliper on an upside down pale or something.
Next: work off these little pain in the ass keepers..don’t break them as you’ll need them later to hold the new rotor in place while you assemble everything.
Next: Remove rotor by screwing in two 17MM bolts in the pre drilled and tapped holes in the rotor ..Do not beat off with a hammer.
Next: Clean rust from hub face with scotch bright or steel wool and then smear a light film of anti-seize compound on the face of hub.
Next; Install new Rotor and secure with those little star keepers I told you not to break while removing.
Next: Reinstall Caliper assy and drop in new pads (pad with the squeaker goes to the inside) Reinstall that spring thingy, then Slide in guide pins and reinsert the little keeper clips in the ends of the pins.
Done
Next well do the rear Brakes
First..Disengage the Parking Brake Cable
Now remove the Caliper assy guide pin bolts (14MM)
Then remove the Caliper Cradle Two 15MM bolts and clean and lubricate all the slide areas and the guide pins that are inside the rubber cups.
Next: remove the rotor like you did on the front ones and you will see a Drum Brakes Assy..(Parking Brake)..Flush this area out real good with Brake cleaner and leave alone otherwise.
Next; Clean the caliper and compress the pistion the same way as you did in the front brake (crack open the bleeder nipple with a 11MM box wrench) and lubricate the piston edges and the appossing side that touches the outside pad..Squeaker pad goes on the inside up against the piston.
Use the anti-sieze in the same area as the front brakes.
Reassemble basically in reverse and don't forget to top off Brake reservoir with fresh Delco Supreme II DOT3 fluid after you pump up the Brakes.
Last edited by a moderator:


